Showing posts with label bread. Show all posts

Friday, December 27, 2024

Meet Jane Dough


An alternative to buying yeast, is to use a sourdough starter. It's a little bit different, but it’s how things used to be done. The yeast you buy only became a thing when folks started buying all their bread from bakeries and it was decided that sacrificing quality for the  convenience of faster production was more profitable.

Yeast is a living organism and a sourdough starter uses wild yeast, it captures from the air. This is why each starter has a slightly different flavor depending on location   

"To speed up the manufacturing process, bakers began adding sweeteners to their dough to give their new bakers yeast more readily-available food. Suddenly, yeast is no longer breaking down grain sugars, since it is perfectly happy working off cane sugar, corn syrup, molasses, or whatever other sweetener might have been used. Inspired by the added speed of the sugar, manufacturers then started to use even more yeast, and the need for speed continued.

This all meant a significant change in chemical composition of a finished loaf of bread - higher natural and added sugar content, tougher starches, and excess single-strain yeast. Without the lactobacilli that come with wild yeast, grain proteins, including gluten, were now unchanged by the fermentation process, leaving them fully intact and hard to digest. Nutrients that became bioavailable due to a long fermentation process remained locked up once sugar became the fermentable ingredient instead of flour.

Cue the rise of gluten-intolerance, and less noticeably, the rise (pun intended) of single-strain-yeast-intolerance. Have trouble eating a ‘normal’ loaf of gluten free bread? Baker’s yeast and sugar might be to blame." -https://www.breadsrsly.com/blog/2017/9/13/wild-yeast-vs-commercial-yeast


I always take a bit of starter out and spread it on a piece of wax paper to dry, then put it in a container so if anything should happen to my starter, I can re-constitute it. It can also be frozen indefinitely, but I find drying it to be preferable as it takes up less space and I can put it in a little baggie to mail it to someone if they need some. Maintaining a starter is as easy as feeding it equal amounts (in weight) of water and flour once a week, and putting in refrigerator. Use a glass or ceramic crock as many metals have a chemical reaction. Stir with a wooden or silicone spoon and cover so nothing can contaminate it. I use “Weck” Jars that have both a wooden and a glass lid. I have 2 because I clean the jar almost each time I use it so it doesn’t get all crusted up and hard. It’s easy to wash if the starter hasn’t dried on it.

 If a dark liquid forms at the top, and smells like alcohol, it means your starter is very hungry. It’s called hooch. You can stir it in or pour it out. 

To maintain your starter you need:

1. a clean jar or bowl, but not metal, 

2. clean, lukewarm water if you have a water filter or source of pure water, use this 

3. flour (you can use all purpose, bread flour or whole wheat, rye, etc. )

You can purchase dehydrated starter, or get some from a friend, or have someone gift you some already reconstituted starter or make your own, which takes awhile and there are some rules to go by to make sure it is ready to use and is safe as you want it to be active enough that the good bacteria can overwhelm any bad bacteria that may try to invade it. Don’t be alarmed, it’s not difficult to take care of. If you keep it on the counter, it needs to be fed daily. If you don’t use it everyday, you can keep it in the refrigerator and feed once a week. I take it out the night before I am going to use it and feed it, and it’s ready for me to use the next morning.

You will find that keeping a minimum amount of starter will keep it happier as the more you have, the more flour you have to feed it to keep it active. I keep about 50 g in the jar and feed it equal amounts of flour and water (50 g or more on a mature starter) This will also keep it from bubbling out of the jar and all over your counters. 

If you are taking a break from using it, you can freeze some or dehydrate as I mentioned previously and it will keep indefinitely until you are ready to revive it.


Your starter should bubble happily soon after feeding.


Sourdough bread is, in my opinion, superior to all other breads. It takes longer to go stale as it is a high hydration dough, has a greater depth of flavor and has many benefits. It is easier to digest, as the fermentation reduces both gluten and carbohydrates, although it is NOT gluten free. It contains probiotics which aid in digestion and promote absorption of nutrients, aiding in glucose regulation and aiding in weight loss, increases phytochemicals which offer anti inflammatory and antioxidant benefits. It’s a great alternative to white bread.


I find making sourdough to be a lot easier than making yeast bread as well. It’s very forgiving and although it’s not the best choice if you need to crack out a loaf in one day, it’s simple to double or triple the recipe or more, takes only a few minutes here and there through out the day.

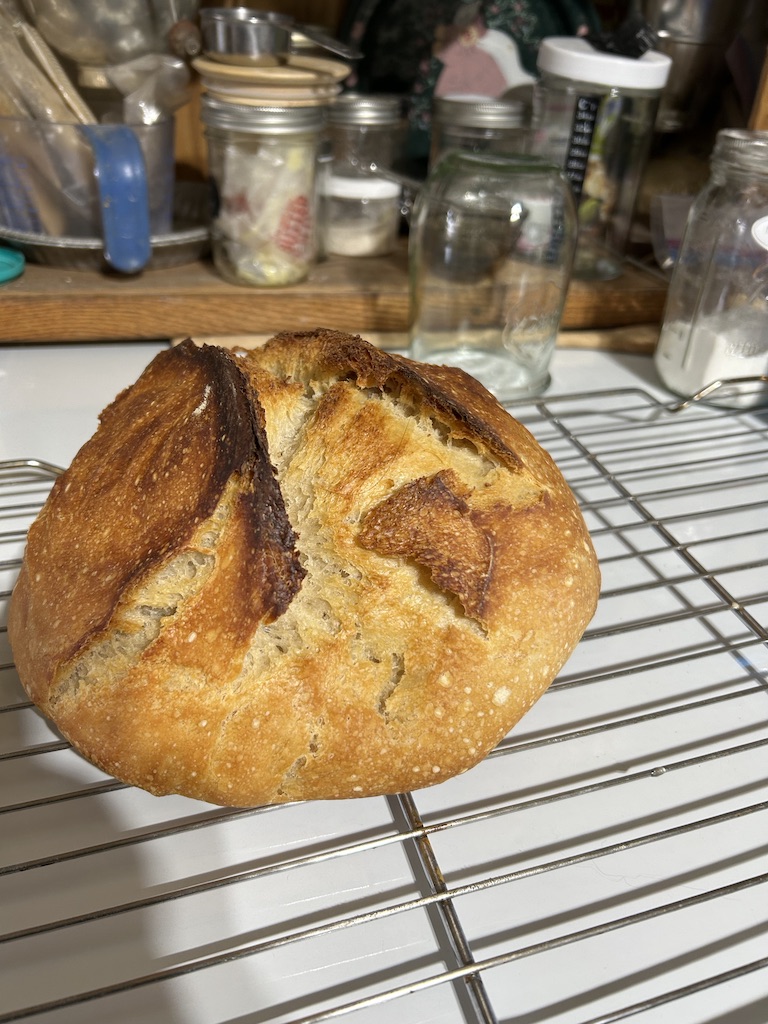
I left dough out on counter last night and by this morning it had overproofed and was puffing out of the bowl.

I was going to toss it out, but decided to shape it and bake it instead. I shaped it, dusted a little flour on it, let it rest an hour and scored it. It was small, had not done any rising after I had shaped it, but I put it in the dutch oven anyway and decided to bake it for the chickens. I was happily surprised  when I took the top off and saw it had risen and baked up beautifully. Always give it a chance. You have nothing to lose by baking it.


 I will share the  recipe I most like to use. There are a few tools that I find make it easier for me, (I have severe rheumatoid disease so many things are not possible) and I will list those as well. You can certainly substitute or do without most of these, but as I make ALL of our bread, it was worth it to me to have these on hand.

First of all, for me, a stand mixer is a must, but you can use a dough whisk or wooden spoon, or even your hands to mix the dough if you need to.

A kitchen scale is also a must have for me. My bread never fails if I measure the ingredients in grams rather than cups.

I have 2 “Weck” jars with lids that I keep my starter in, they are very easy to clean and I tend to change jars almost every time I make bread only because dried on starter is hard to get off, so I put the left over starter in the clean jar and feed it before putting it away.

A plastic scoop spoon. I find this makes it really easy for me to measure out my starter. 

Separate acrylic containers for putting my starter&water in and flour in the other.

Instant read thermometer. Although not a total necessity I have found it handy to check the internal temperature of loaves to make sure they are done which one of my recipes, never is when I bake it and having the thermometer has saved my bread which would be undercooked and gummy if I just trusted the baking timer. (It’s called the Unloaf)

A bread lame to score your loaves so they can expand properly.

Rice flour (not a deal breaker but it does make it easier to score your loaves and also makes decorative scoring show up)

Kitchen towel, or shower cap type cover to keep your dough from drying out.

Banneton- for letting your dough bulk ferment. You can use a bowl and dish towel instead.


Now you are ready to bake bread!

The ONE Sourdough 

500 g bread flour

350 g water (distilled, although I use spring water)

100 g unfed starter (I feed the night before)

15 g kosher salt

This can be multiplied to make however many loaves you need.


Measure and mix everything together to make a shaggy dough. 

Cover and let rest for 1 hour.

(IF I make multiple loaves, I will put the dough in a one gallon food safe bucket)

Begin doing stretch and folds, lifting and folding over dough, turning 1/4 turn, repeat until all 4 sides have been done.

Wait 30 min and repeat.

Do a total of 5 series of stretch and folds with 30 min in between.

Set Dough to rise 50%

Note, you are NOT letting it double like you would a yeast dough

Shape, (if dough is difficult to shape, continue turning it in place until it has developed more tension and holds it’s shape. You can use a dough scraper to push it around if necessary) place in well floured banneton, cover and put in fridge for a bulk ferment. ( I leave mine in for 2 nights then bake the morning of day 3)

When ready to bake, put parchment paper or dough sling over dough, and dump it out, set in cold dutch oven. Sift a little rice flour over the top and score with a razor blade or bread lame.

Place in cold over and bake at 475 for 55 min covered.

Remove cover, reduce heat to 425 and bake an additional 15 min to finish and brown the crust.

Remove from oven, place on rack and let cool for one hour before slicing, or it will be gummy inside.

Enjoy your amazing bread with a chewy crust and soft, open crumb. 

*note

It is easy to do inclusions to make flavored loaves such as jalapeno&cheese, adding during the stretch and folds.

*As a high hydration bread, do not put your bread in ziplocs to store, as the moisture will cause it to quickly mold. I prefer to place mine in a linen bread bag, then into a bread box. It allows the bread to breath, without letting it go stale.


Sunday, April 19, 2020

Rolling in Dough


As a follow up to prior blog, the rock tumbling was successful. A few of the rocks I gathered here at the ranch proved worthy, and many of my granddaughter's rocks, mostly quartz, from the ranch her Daddy works on were very pretty. Unfortunately the pictures don't do them justice and a few of them could have stood to be tumbled longer to get all the scratches off of them, but it was a great learning experience and I hope to do better. Meanwhile, I learned how to drill holes in the smaller ones to use them up.


As everyone has been home bound lately, I assume many are getting to the point they might decide this is the time to be a tad more self sufficient. Having lived 4 hours from town for the past 13 years, I’ve got that nailed down pretty well.

 So today, we will talk about making bread.


There are so many choices and recipes to choose from, all equally delicious.

Let’s start with a basic white bread.

There are different kinds of flour. All purpose flour is fine, but bread flour is nice for loaves as it has a bit more gluten and rises better, making for a lighter loaf. If you have a grain mill, you can also make your own flour out of various things, wheat, almond, rice, etc. I prefer wheat. I usually buy #25-#50 of wheat berries at a time. I have soft white, (for cakes, pastry, etc) hard white (for white bread) and hard red (for stronger flavored wheat breads, great in waffles) on hand. However, if you are milling your own flour you are probably already an expert and don't need to read this blog. So lets stick with all purpose, bread flour, or commercial wheat flour which is nothing like the flour that is ground at home as both the hull and the wheat germ have been removed, along with much of their nutrition.

Yeast comes in different forms as well. You can buy it in packets, jars or bricks. It can be kept indefinitely in a freezer and for a good long time in the fridge. You will find Active Dry, Instant Dry and Rapid Rise Yeast. I use the Active dry as I buy it in big bricks so I always proof it. The only difference is that Active Dry requires activation by proofing in warm water while Instant Dry does not. The Rapid Rise is usually used in bread machines, which I don't really care for myself.

Keep your yeast tightly sealed. Mine is kept in a little crock with a rubber seal.
Yeast is a living organism. Baker's yeast began to be made and used in 1857 or so, making leavening bread faster and more reliable, but at some cost to both the. nutrition and flavor of the bread itself. But, I digress. We are talking first about bread made with commercial yeast, so...
let’s assume your yeast is good.

Most bread recipes have sugar or honey in them. Primarily, sugar is food for the yeast and speeds up the yeast breaking down the starch in the flour. Honey does the same but also adds a nice flavor to wheat bread.

Salt regulates the yeast activity, helping the yeast to ferment more evenly. It also assists in shelf life and gives the dough body as well as enhancing flavor.

Oil/Lard/Crisco also helps keep the bread from drying out and going stale as quickly as it would without.

You will need something to cook your bread in. Bread pans are the most popular, but different recipes can be cooked in a dutch oven, in baguette pan or even free form. Some require a brotform which is a type of basket the bread rises in then is quickly dumped onto parchment paper on a hot stone.

You will need a serrated bread knife or slicer. I use both.


 The first two recipes will only need a pair of bread pans as they make 2 loaves.

The first thing I do, is to “proof my yeast” in a bit of warm water. You don't want the water too hot or it will kill the yeast. If the recipe uses milk and egg, like most white bread and other recipes, you will use less water to proof the yeast and usually scald the milk on the stove before adding the fat, sugar and salt to it. Let those cool before adding to the proofed yeast.

It will look sort of poofy-ish on the top of the water if it is still good.
If it doesn’t, you need fresher yeast.

Yeast is a living organism. Baker's yeast began to be made and used in 1857 or so, making leavening bread faster and more reliable, but at some cost to both the. nutrition and flavor of the bread itself. We are talking first about bread made with commercial yeast, so...
let’s assume your yeast is good.

Add your salt and about 2-3 cups of your flour to start making your dough. I use a stand mixer, but used to do it all by hand.

I have both a KitchenAid and a Bosch Mixer. The KA can make 2 loaves nicely, but my Bosch makes 4 and is easier both to use and to clean up. Trust me, if you are looking to purchase a mixer, go for the Bosch. It can do SO much more! It also has an 850 watt motor as opposed to KA's 250watt. I made bread for decades without a mixer, so it's not a deal breaker. But with RA and PsA, my hands can no longer do the work without great cost. I can make 4 loaves at a time in the Bosch, then I slice, wrap and freeze it and have a month's worth of homemade bread done in an afternoon, for pennies.

The Bosch isn't pretty but its worth its weight in gold

 By hand, use a large bowl and mix with a wooden spoon. Slowly add the rest of the flour until the dough is rather stiff and not too sticky.

If using a mixer, do the same on low power using the dough hook and after adding all but the last cup of the remainder of the flour, 1/2 cup at a time, start adding the last cup of flour a couple of TBL at a time until the dough pulls away from the sides of the bowl. Too much flour will make the bread heavy. Too little and it will be too sticky to work with. The weather can affect your bread making, so that's why I recommend adding the flour in this way. It may take a little more or a little less than the recipe calls for.  I made many brick loaves in the beginning before I figured this out.

Once the dough is not too sticky (a little bit sticky is good) flour your hands and dump it on a lightly floured surface and begin kneading. The more you knead the bread, the less sticky it will be. Flour your hands rather than adding flour to the dough as the latter will make for a dry, heavy bread.
Using the heels of your hands push down on the dough, fold it over on itself, turn it 1/4 turn and repeat over, and over until it “pushes back”. Kneading not only mixes the ingredients well, but develops the gluten which allows the dough to become elastic and rise without the strands breaking. Without the gluten strands developed, your bread will be hard and flat. You cannot over develop it kneading by hand, but you can by machine, so be careful not to overmix once the dough pulls away from the sides of your mixer bowl. I like to dump it out like when I hand knead and see if the dough is, indeed springing back to my hand. The kneading is a crucial step of breadmaking. If the gluten strands are not developed enough, your bread won't be very good.

Once the dough is elastic and springy, silky (it will feel both smooth an HAPPY) grease a bowl, dump it in, turning it once, and cover, setting it in a warm place to rise. I like to use a cotton cloth, like an old fashioned diaper, that has been soaked in warm water and well squeezed out, to cover my bread. You can also put a bowl of hot water in your oven and set the dough inside to rise. When yeast acts on flour, it converts natural grain sugars and starches into carbon dioxide, which creates air pockets that make the dough rise.

Let it rise til double. You can push a finger into the dough and if it leaves an indent it's ready to dump it out again on your pastry cloth or floured counter top. Punch down, cover and let rest for about 10 minutes.
finger print after second rise


I then fold it all up and cut it down the middle with a dough scraper.

Using my hands, I flatten out the dough into a rectangle, making sure there are no big gas pockets. I then roll it up, pinching the bottom together and folding the ends and pinching under before setting in well greased pan to be covered and rise again until double. Using the finger print method again, I check to see if it’s ready.

Then into the oven it goes.

so let's condense this...

WHITE BREAD

Ingredients:

2  1/4 tsp or 1 package yeast
1/4 cup warm water
2 cups milk, scalded
2 Tbl sugar
2 tsp salt
1 Tbl fat (butter, crisco or lard)
5 3/4 to 6 1/4 cups flour

Directions:

Proof yeast in water in large bowl or mixer bowl
Combine hot milk, sugar, fat, and salt, cool to lukewarm
Stir in 2 cups of flour, beat well, then add to yeast mixture
Add flour to make moderately stiff dough.
On lightly floured surface, knead until smooth and springy, 8-10 minutes
Set in greased bowl, turning once, cover and let rise (about 1 hr)
Punch dough down, dump out on counter and cover. Let rest 10 minutes.
Divide dough in half, press down into rectangle with hands, popping any
gas bubbles.
Roll into loaf, pinching bottom together and tucking ends underneath.
Put in greased loaf pans, cover and let rise second time (about 40 min)
Bake @400 for 35 min. Loaf should sound hollow when tapped.
Take loaf out of pan on rack or wooden cutting board. Immediately
rub a cube of butter over tops of loaves and let cool before cutting.


RANDY'S FAVORITE HONEY WHEAT BREAD

Ingredients:

3 cups WW flour
3 cups Bread flour
2 cups warm water
1 cup buttermilk

next day:
4 1/2 tsp yeast
1/4-1/2 cup warm water
1/3 cup honey
1/4 cup butter (or oil, lard)
1 TBL salt

Directions:
Mix flours and liquids and let soak overnight or up to 24 hours
Next day proof yeast in water, add remaining ingredients, then mix with flour mix

As with White Bread recipe above, knead, rise, shape into loaves rise, bake 45 min @ 375

Let me know how it goes. The Honey Wheat bread recipe uses what is known as a "levain" which is a bit like a sourdough starter as it captures wild yeast out of the air, adding to both the rising and flavor of the bread.

Let me know what you think, and how it goes!! And any of you experts, if you have something to add or a super special commercial yeast recipe, please chirp in, to help out my readers who are here trying to learn a new skill!

Next blog will be no-knead bread and sourdough.

Happy baking, from our range to yours!

Me & Heath


  1.